搜索到
12
篇与
的结果
-
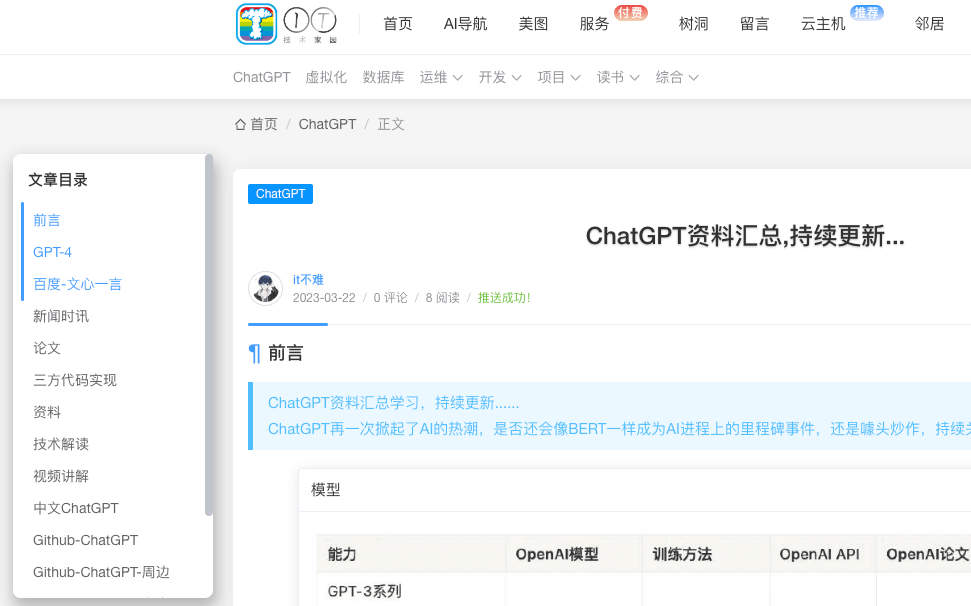
 Joe主题文章添加文章目录树 前言去年写过一篇 Joe主题开启文章目录结构 ,最近感觉有点难看,而且默认是隐藏的,每次都得用鼠标点一下。网上找了其他的目录树方案教程,都很老了。设置了都没有效果。参考着别人的网站,折腾了一下午终于弄好了,特此记录下来。效果修改post.php加载js和css<!--加在头部--> <link rel="stylesheet" href="<?php $this->options->themeUrl('assets/css/jfloor.min.css'); ?>"> <!-- body标签 最下面 --> <?php if ($this->options->jfloor === 'on') : ?> <!-- 目录树 --> <script src="<?php $this->options->themeUrl('assets/js/jfloor.min.js'); ?>"></script> <?php endif; ?>加载功能代码,大概41行 <div class="joe_container j-post"> <section class="j-adaption" style="height: auto !important;"> <?php if ($this->options->jfloor === 'on') : ?> <?php GetCatalog(); ?> <?php endif; ?> ... </div>functions.php后台功能开关 //开启文章目录树显示 $jfloor = new Typecho_Widget_Helper_Form_Element_Select( 'jfloor', array( 'off' => '关闭(默认)', 'on' => '开启', ), 'off', '是否启用文章目录树显示', '介绍:开启之后 在文章最左侧显示目录树(手机端不显示)' ); $jfloor->setAttribute('class', 'joe_content joe_post'); $form->addInput($jfloor->multiMode());core/function.php目录树函数,放在文件最后/*生成文章目录树*/ function CreateCatalog($obj) { global $catalog; global $catalog_count; $catalog = array(); $catalog_count = 0; $obj = preg_replace_callback('/<h([1-6])(.*?)>(.*?)<\/h\1>/i', function ($obj) { global $catalog; global $catalog_count; $catalog_count++; $catalog[] = array('text' => trim(strip_tags($obj[3])), 'depth' => $obj[1], 'count' => $catalog_count); return '<h' . $obj[1] . $obj[2] . ' id="cl-' . $catalog_count . '"><span>' . $obj[3] . '</span></h' . $obj[1] . '>'; }, $obj); return $obj; } /*获取文章目录树*/ function GetCatalog() { global $catalog; $index = ''; if ($catalog) { $index = '<ul>'; $prev_depth = ''; $to_depth = 0; foreach ($catalog as $catalog_item) { $catalog_depth = $catalog_item['depth']; if ($prev_depth) { if ($catalog_depth == $prev_depth) { $index .= '</li>'; } elseif ($catalog_depth > $prev_depth) { $to_depth++; $index .= '<ul>'; } else { $to_depth2 = ($to_depth > ($prev_depth - $catalog_depth)) ? ($prev_depth - $catalog_depth) : $to_depth; if ($to_depth2) { for ($i = 0; $i < $to_depth2; $i++) { $index .= '</li></ul>'; $to_depth--; } } $index .= '</li>'; } } $index .= '<li><a href="#cl-' . $catalog_item['count'] . '" data-href="#cl-' . $catalog_item['count'] . '">' . $catalog_item['text'] . '</a>'; $prev_depth = $catalog_item['depth']; } for ($i = 0; $i <= $to_depth; $i++) { $index .= '</li></ul>'; } $index = '<div class="j-floor s-j-floor"><div class="contain" id="jFloor" style="top: 126px;"><div class="title">文章目录</div>' . $index . '<svg class="toc-marker" xmlns="http://www.w3.org/2000/svg"><path stroke="var(--theme)" stroke-width="3" fill="transparent" stroke-dasharray="0, 0, 0, 1000" stroke-linecap="round" stroke-linejoin="round" transform="translate(-0.5, -0.5)" /></svg></div></div>'; } echo $index; }core/core.php文章页面相应位置(初始化函数themeInit)加载,大约第83行 /* 文章目录树 */ if ($self->is('single')) { $self->content = CreateCatalog($self->content); }需要的资源文件jfloor.min.css //样式jfloor.min.js //功能实现下载{cloud title="JOE文章目录树" type="bd" url="https://pan.baidu.com/s/1o83oneH3WumzrmtUVdQM7w" password="w4ut"/}本站备份下载[attach]1405[/attach]
 -
 emlog判断文章发布时间超过特定时间时输出一段代码 打开当前模板下的 echo_log.php 文件 ,把下面判断代码添加到自己想要显示的地方<?php $time=strtotime(gmdate('Y-n-j', $date));$now=time();$t=$now-$time;if($t>3600*24*30){?> <div class="stetement" style="color: #ad9948;background: #fff4b9 url(叹号图标地址) -1px -1px no-repeat;border: 1px solid #eac946;overflow: hidden;margin: 3px 0;padding: 15px 15px 15px 35px;font-size: 14px;text-indent: 0;">本文最后更新于<?php echo gmdate('Y-n-j', $date); ?>,已超过 1 年没有更新,如果文章内容或图片资源失效,请留言反馈,我们会及时处理,谢谢!</div> <?php }?>把上面代码内的 叹号图标地址 更改为自己的图标存放地址即可。下面列出一些常用的时间一年:3600*24*365 一个月:3600*24*30 一个季度:3600*24*120 半年:3600*24*180然后把文字修改修改即可wordpress更改方法如图示:
 -
emlog pro版本获取文章缩略图 emlog列表页面缩略图先调用正文HTML代码第一张图片,没有的话就调用Markdown语法数据库的图片,如果都没有则调用随机图片代码,以前正则读数据库的代码不能用了这里我做了个修改,以前的版本或者PRO都能使用在模板的module.php文件中加入以下代码 <?php //全局匹配正文中的图片并存入imgsrc中 function img_ns($content){ preg_match_all("|<img[^>]+src=\"([^>\"]+)\"?[^>]*>|is", $content, $img); $imgsrc = !empty($img[1]) ? $img[1][0] : '';if($imgsrc):return $imgsrc;endif;} //Custom: 获取附件第一张图片 function img_fj($content){preg_match_all("/\]\((.*?)\)/", $content, $img);$imgsrc = !empty($img[1]) ? $img[1][0] : '';if($imgsrc):return $imgsrc;endif;} ?>在log_list.php的foreach循环中加入如下代码 <?php if(img_ns($value['content'])){$imgurl = img_ns($value['content']); }elseif(img_fj($value['content'])){$imgurl = img_fj($value['content']); }else{$imgurl = TEMPLATE_URL.'images/'.rand(1,5).'.jpg';} ?>在img的src属性里调用 <?php echo $imgurl;?>总结Markdown语法的数据库图片正则代码为/\]\((.*?)\)/
-
 给typecho主题增加一个热门文章排行榜 教程简介今天欣赏我的网站的时候总感觉侧边栏上缺了一点什么,突然我就灵光一闪,不如加个热门文章排行榜,没事还能关心关心自己的文章到底哪个受欢迎。空想不做不是我的性格,既然想到了,那我们就要实现,但是我对这个typecho的api实在是不了解,所以说在查了大量资料和文章之后,终于写出来了。我就直接贴我写好的代码了啊,也不讲过程,因为过程不重要,结果才是最重要的。/*热门文章*/ function HotPosts() { $archive = Typecho_Widget::widget('Widget_Archive'); $hotNums = 5; //热门文章数 $minViews = 10; //最低阅读量 $db = Typecho_Db::get(); $select = $db->select()->from('table.contents') ->where('table.contents.type = ?', 'post') ->where('table.contents.status = ?', 'publish') ->limit($hotNums); $select->order("table.contents.views", Typecho_Db::SORT_DESC); if ($minViews > 0) { $select->where('table.contents.views >= ?', $minViews); } $rows = $db->fetchAll($select); foreach ($rows as $row) { $HostPostList[] = $archive->filter($row); } return $HostPostList; } 把这个代码放到主题目录下的functions.php就行了,主题和主题应该不一样吧,没有functions.php的话就放到sidebar.php要是连sidebar.php都没有,那么我建议使用Cuckoo主题。然后我们放好函数之后,就可以把它加到侧边栏了,我们在sidebar.php合适的位置加入以下代码,你们别照扒,安装自己主题的样式来。<?php $HotPosts = HotPosts();?> <?php if (!$this->is('single') && count($HotPosts) > 1): ?> <div class="mdui-card sidebar-info mdui-shadow-10"> <ul class="mdui-list"> <div class="sidebar-reply-title">热门文章</div> <li class="mdui-divider mdui-m-y-0"></li> <?php foreach ($HotPosts as $v) {?> <a title="<?=$v['title'];?>" href="<?=$v['permalink'];?>"> <li class="mdui-list-item mdui-ripple sidebar-reply-list"><div class="sidebar-reply-text"><?=$v['title'];?></div></li> <li class="mdui-divider"></li> </a> <?php }?> </ul> </div> <?php endif;?> 因为我的文章页面已经有猜你喜欢这个栏目了,所以说在文章界面是不显示热门文章这个栏目的。如果想让他在任何界面都显示,可以写成下面这样<?php $HotPosts = HotPosts();?> <?php if (count($HotPosts) > 1): ?> <div class="mdui-card sidebar-info mdui-shadow-10"> <ul class="mdui-list"> <div class="sidebar-reply-title">热门文章</div> <li class="mdui-divider mdui-m-y-0"></li> <?php foreach ($HotPosts as $v) {?> <a title="<?=$v['title'];?>" href="<?=$v['permalink'];?>"> <li class="mdui-list-item mdui-ripple sidebar-reply-list"><div class="sidebar-reply-text"><?=$v['title'];?></div></li> <li class="mdui-divider"></li> </a> <?php }?> </ul> </div> <?php endif;?> 大功告成保存好了之后回到网站看一看,如果有不太满意的地方还可以微调,修改显示文章数量和最低的浏览量可以安装注释来修改。
 -
 Typecho 文章按最后编辑排序 typecho默认的文章排序方式是按照文章发布的时间来排序的,有的时候我们可能写了某篇文章没写完,或者需要及时修改某篇文章已更新其内容的时效性,这时候可能我们就需要文章的排列是通过最后修改文章的时间来排序。偶然在jdeal大大的博客中发现了以下方法,修改后可根据最后编辑时间排序文章,下面是修改教程。打开根目录下/var/Widget/Archive.php文件,在源码1387-1393行处,可以看到如下的文章排序代码:/** 仅输出文章 */ $this->_countSql = clone $select; $select->order('table.contents.created', Typecho_Db::SORT_DESC) ->page($this->_currentPage, $this->parameter->pageSize); $this->query($select); }将上面代码中table.contents.created改成table.contents.modified就可以了
 -
 emlog文章列表获取附件(图片)数量方法 本方法实际获取的是文章附件的数量,而非只是图片的数量,如果你的文章含有文件附件,列表也会显示成图片数量。所以此方法最适合于文章图片特别多而且没有附件的博客。有强迫症必须显示图片实际数量的,请绕道。 emlog文章列表获取附件(图片)数量,方法过于简单,修改博客emlog模板文件步骤如下:1、在module.php文件里面加入以下代码:<?php //图片数量 function pic_num($attnum){ if ($attnum > 0) { echo '<span class="attnum" title="此文有 '.$attnum.' 张图片">',$attnum,'</span>'; } }?>2、在log_list.php文件里面进行以下操作:`找到 <?php echo $value['log_title']; ?> ,在其后 加上 <?php pic_num($value['attnum']); ?> 即可。`3、添加css样式到你的样式文件`.attnum{background: url(images/img.gif) no-repeat 5px center;padding-left: 20px} //图片可替换自己的图片,字体大小自己调节`
 -
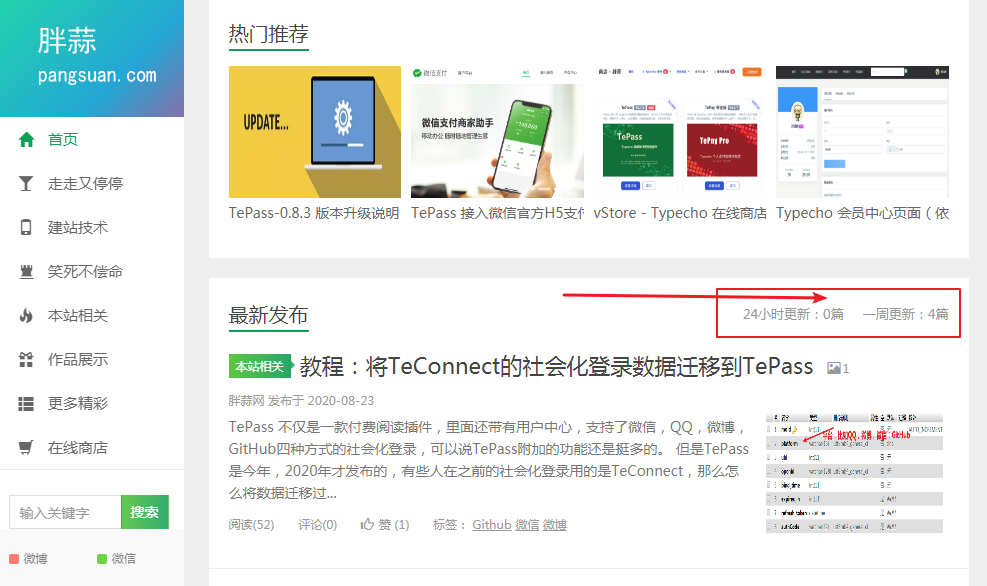
 Typecho 统计最近更新文章数量 我最近又换主题了,每年不换十几个主题,心里总觉得不痛快,小灯泡的主题很好,我想改,但是一更新,我又麻烦了,所以就干脆自己搞吧。废话说了这么多,这个主题有个最近更新文章数量的统计,见下图:那么怎么实现呢?代码如下://统计多少天内发布的文章数量 function getNumPosts($days){ $db = Typecho_Db::get(); $st_days= time()-$days*24*60*60; $result = $db->fetchAll($db->select()->from('table.contents') ->where('status = ?','publish') ->where('type = ?', 'post') ->where('modified >= ?', $st_days) //统计时间 ); $total_posts = count($result); return $total_posts; }怎么调用呢?在你需要显示文章数的地方插入下面代码:<?php echo getNumPosts(1); ?>括号里面的1,表示1天内,可以自己根据需要修改天数。来源:https://pangsuan.com/p/typecho-posts-count.html
 -
 分享:WordPress根据分类调用文章模板 如果我们用WordPress做一个企业网站必然会遇到一个问题,新闻内容的页面和企业产品的页面的布局格式肯定是不一样的。如何实现这两者不同的文章类型调用不同的模板呢,今天我就跟大家分享一下如何根据分类调用文章模板。第一步:建立一个single.php文件,如果你的模板目录已经有这个文件,可以将下面的一段代码内容替换原来的内容。<?php if(in_category('product') { include(TEMPLATEPATH . '/single-product.php'); } else { include(TEMPLATEPATH . '/single-default.php'); } ?>上面代码的意思就是,判断文章是否属于product的分类,如果是就调用product的文章模板,默认调用product的文章模板。第二步:分别建立single-product.php和single-default.php文件,并调用不同的文章内容循环程序。以single-product.php为例子,single-product.php的内容见下面的代码: <div id="container"> <div id="content" role="main"> <?php get_template_part( 'loop', 'product' ); ?> </div><!-- #content --> </div><!-- #container -->第三步:分别建立loop-product.php和loop-default.php文件,这两个文件就是针对不同的模板进行的文章内容布局。其实这个是很简单的,只要研究透了原理,举一反三,可以实现一些更高级的功能。好了,今天就分享到这里了,如果还有疑问的话可以联系谭海波为你解答。文章出处:http://tanhaibo.net/2014/04/entry-template.html
 -
 删除WordPress文章自动草稿与修订版本 当我们在用WordPress发布文章的时候,会产生很多自动保存的草稿和N多个修订版,这样一来不但浪费了很多ID,而且也给数据库增加了不少负担,长此以往就有很多数据都是垃圾数据,相信这个问题困扰了很多使用WordPress的朋友,今天我就来分享下如何解决这个问题。我们先说删除文章的修订版本吧,其实很简单,只要打开WordPress根目录下的wp-config.php文件,在适合的地方加上“define(‘WP_POST_REVISIONS’, false);”这一行代码即可。删除自动草稿只要在主题目录下的functions.php文件增加下面一段代码即可。/* 移除自动保存和修订版本 */ remove_action('pre_post_update', 'wp_save_post_revision' ); add_action( 'wp_print_scripts', 'disable_autosave' ); function disable_autosave() { wp_deregister_script('autosave'); }那么如何删除之前已经存在的自动草稿和文章修订版本呢?首先确保你有数据库修改的权限,目前一般的PHP服务器或虚拟空间都会提供phpmyadmin的数据库管理平台,登录了以后进入所在数据库,然后插入SQL语句查询,以谭海波博客为例,我执行了这两行代码,就把自动草稿和修订版本全部给咔嚓了。SELECT * FROM `thb_posts` WHERE post_status="auto-draft"; SELECT * FROM `thb_posts` WHERE post_type="revision";
 -
 纯CSS打造wordpress时间轴文章归档页 建页面archives,然后把下面的代码扔进去<div class="archives"> <?php $previous_year = $year = 0; $previous_month = $month = 0; $ul_open = false; $myposts = get_posts('numberposts=-1&orderby=post_date&order=DESC'); foreach($myposts as $post) : setup_postdata($post); $year = mysql2date('Y', $post->post_date); $month = mysql2date('n', $post->post_date); $day = mysql2date('j', $post->post_date); if($year != $previous_year || $month != $previous_month) : if($ul_open == true) : echo '</ul>'; endif; echo '<h3 class="m-title">'; echo the_time('Y-m'); echo '</h3>'; echo '<ul class="archives-monthlisting">'; $ul_open = true; endif; $previous_year = $year; $previous_month = $month; ?> <li> <a href="<?php the_permalink(); ?>"><span><?php the_time('Y-m-j'); ?></span> <div class="atitle"><?php the_title(); ?></div></a> </li> <?php endforeach; ?> </ul> </div> 其实归档的教程一大堆,主要是我这个CSS样式哈,纯CSS实现时间轴,当然,IE9-是挂掉了。.archive-title{border-bottom:1px #eee solid;position:relative;padding-bottom:4px;margin-bottom:10px} .archives li a{padding:8px 0;display:block} .archives li a:hover .atitle:after{background:#ff5c43} .archives li a span{display: inline-block;width:100px;font-size:12px;text-indent:20px} .archives li a .atitle{display: inline-block;padding:0 15px;position:relative} .archives li a .atitle:after{position:absolute;left:-6px;background:#ccc;height:8px;width:8px;border-radius:6px;top:8px;content:""} .archives li a .atitle:before{position:absolute;left:-8px;background:#fff;height:12px;width:12px;border-radius:6px;top:6px;content:""} .archives{position:relative;padding:10px 0} .archives:before{height:100%;width:4px;background:#eee;position:absolute;left:100px;content:"";top:0} .m-title{position:relative;margin:10px 0;cursor:pointer} .m-title:hover:after{background:#ff5c43} .m-title:before{position:absolute;left:93px;background:#fff;height:18px;width:18px;border-radius:6px;top:3px;content:""} .m-title:after{position:absolute;left:96px;background:#ccc;height:12px;width:12px;border-radius:6px;top:6px;content:""} 再加个点击月份伸缩效果吧 $('.archives ul.archives-monthlisting').hide(); $('.archives ul.archives-monthlisting:first').show(); $('.archives .m-title').click(function() { $(this).next().slideToggle('fast'); return false; }); 文章来源:http://fatesinger.com/wordpress-archive.html
 -
 wordpress插件Ecall-js方式外部调用wordpress文章 wordpress插件Ecall的主要特点:(1)自由定制模版(2)缓存加速(3)隐藏分类(4)授权机制,防止恶意调用(5)文章的js调用方式(6)遵循WordPress插件开发规范wordpress插件Ecall使用说明:(1)你可以在任意网站加入如下代码:<script type=’text/javascript’ src=”http://wpcourse.com/api.php?key=123&cid=1&rows=2″></script>http://wpcourse.com:代表博客域名key:代表插件生成的授权密钥(在插件管理页面)cid:代表目录的idrows:代表显示的数据调试 可选参数文章来源:http://blog.webfuns.net/archives/313.html
 -
 wordpress调用随机文章的代码 有些wordpress博主喜欢在文章内容的结尾或者侧边栏随机调用几篇文章,以提高网站的粘性,也利于seo。wordpress随机文章的调用代码如下:<?php query_posts(array('orderby'=>'rand','posts_per_page'=>10,'ignore_sticky_posts'=>true)); while(have_posts()): the_post(); ?> <a href="<?php the_permalink(); ?>" title="<?php the_title_attribute(array('before'=>'查看 ','after'=>' 的文章')); ?>"><?php the_title(); ?></a> <?php endwhile; wp_reset_query(); ?>


