首页
微语
统计
友链
留言
memos
圈子
图床
推荐
相册
网站监控
VPS监控
Search
1
实现typecho微信时光机功能的图文教程
47,835 阅读
2
为Typecho添加webp解析
43,547 阅读
3
Memos备忘录,记录瞬间想法
27,925 阅读
4
emlog数据成功迁移到typecho
27,809 阅读
5
Jasmine - 简约、美观的博客主题
26,509 阅读
手机达人
免费资源
电脑网络
娱乐休闲
网站建设
威言威语
Typecho
Emlog
WordPress
服务器
主题
插件
排行榜    
登录
/
注册
Search
标签搜索
wordpress
发布
插件
免费
教程
typecho
EMlog
PHP
代码
CSS
华为
图片
代码修改
安装
评论
手机
诺基亚
微信
文章
智能
Chen'mo
累计撰写
1,269
篇文章
累计收到
378
条评论
首页
栏目
手机达人
免费资源
电脑网络
娱乐休闲
网站建设
威言威语
Typecho
Emlog
WordPress
服务器
主题
插件
页面
微语
统计
友链
留言
memos
推荐
相册
网站监控
VPS监控
搜索到
7
篇与
的结果
2022-09-26
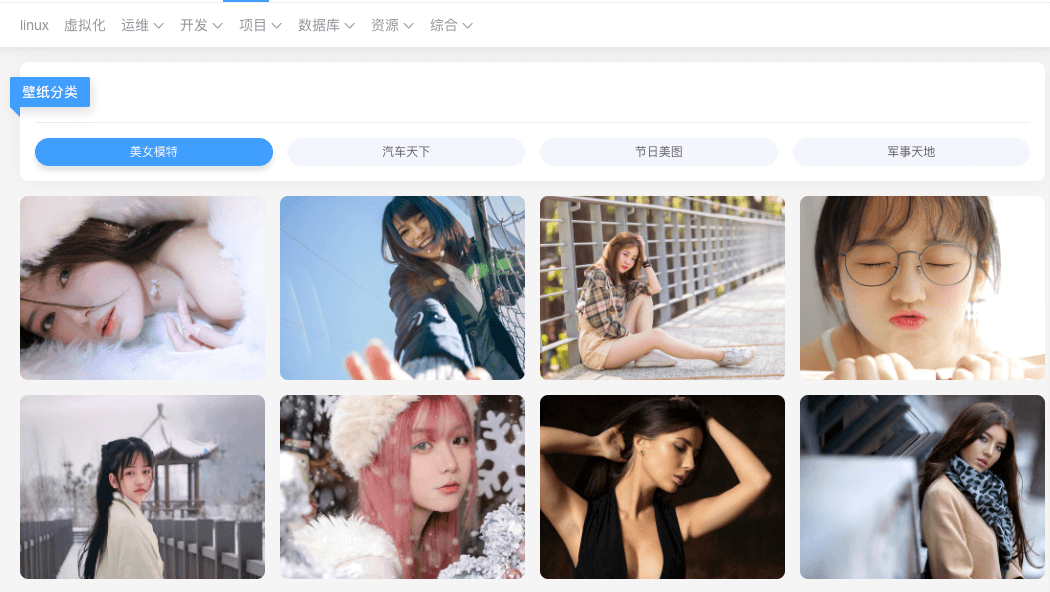
Joe主题-壁纸代码改造
前言Joe主题有写好的壁纸模版,直接启用即可。刚开始博主感觉分类太多了,有些分类也不是自己喜欢的。就没有启用,最近有时间研究了一下代码。改造了一下,只留下自己感兴趣的分类。核心代码主要是core/route.php文件内的两个函数,调用了360的壁纸接口,原版如下/* 获取壁纸分类 已测试 √ */ function _getWallpaperType($self) { $self->response->setStatus(200); $json = _curl("http://cdn.apc.360.cn/index.php?c=WallPaper&a=getAllCategoriesV2&from=360chrome"); $res = json_decode($json, TRUE); if ($res['errno'] == 0) { $self->response->throwJson([ "code" => 1, "data" => $res['data'] ]); } else { $self->response->throwJson([ "code" => 0, "data" => null ]); } } /* 获取壁纸列表 已测试 √ */ function _getWallpaperList($self) { $self->response->setStatus(200); $cid = $self->request->cid; $start = $self->request->start; $count = $self->request->count; $json = _curl("http://wallpaper.apc.360.cn/index.php?c=WallPaper&a=getAppsByCategory&cid={$cid}&start={$start}&count={$count}&from=360chrome"); $res = json_decode($json, TRUE); if ($res['errno'] == 0) { $self->response->throwJson([ "code" => 1, "data" => $res['data'], "total" => $res['total'] ]); } else { $self->response->throwJson([ "code" => 0, "data" => null ]); } }优化主要优化 _getWallpaperType 函数,去掉不想要的分类/* 获取壁纸分类 已测试 √ */ function _getWallpaperType($self) { $self->response->setStatus(200); $json = _curl("http://cdn.apc.360.cn/index.php?c=WallPaper&a=getAllCategoriesV2&from=360chrome"); $res = json_decode($json, TRUE); //$file=dirname(__FILE__).'/debug.log'; //保留喜欢的分类 $ilike = ['6', '12', '13', '22']; $re_arr = array(); foreach ($res['data'] as $key => $value) { if (in_array($value['id'], $ilike, true)){ //file_put_contents($file, $value['name']."\n",FILE_APPEND); array_push($re_arr, $value); } } if ($res['errno'] == 0) { $self->response->throwJson([ "code" => 1, "data" => $re_arr ]); } else { $self->response->throwJson([ "code" => 0, "data" => null ]); } }效果首页美女发现是固定的,又懒得翻页。加了个随机,每次刷新都是不同的。/* 获取壁纸列表 已测试 √ */ function _getWallpaperList($self) { $self->response->setStatus(200); $cid = $self->request->cid; //前50页随机显示图片 if (($cid == 6)&&($self->request->start < 2400)) { $start = $self->request->start + rand(1,4800); }else { $start = $self->request->start; } $count = $self->request->count; //$file=dirname(__FILE__).'/debug.log'; //file_put_contents($file, $cid."|".$start."|".$count."\n",FILE_APPEND); $json = _curl("http://wallpaper.apc.360.cn/index.php?c=WallPaper&a=getAppsByCategory&cid={$cid}&start={$start}&count={$count}&from=360chrome"); $res = json_decode($json, TRUE); if ($res['errno'] == 0) { $self->response->throwJson([ "code" => 1, "data" => $res['data'], "total" => $res['total'] ]); } else { $self->response->throwJson([ "code" => 0, "data" => null ]); } }
2022年09月26日
6,610 阅读
0 评论
0 点赞
2021-06-16
网站手机移动端添加下边栏导航菜单
手机端访问的时候,给网站手机移动端添加下边栏,非常简单的实现方式,下面直接上教程。 本站有两个版本,一个是图片版本,一个是icon图标版本。 图片版本 本站以前所使用的版本,主要修改两个文件: 修改footer.php 首先,在页脚文件foot.php或者footer.php文件的最下面放入以下代码:<nav class="nav-shouji"> <div class="nav-item"> <div class="img"> <a href="https://chenyu.me/category/default/"><img src="https://chenyu.me/My/photo/ysni-sj/ysni-sj1.png"></a> </div> </div> <div class="nav-item"> <div class="img"> <a href="https://chenyu.me/category/web/"><img src="https://chenyu.me/My/photo/ysni-sj/ysni-sj2.png"></a> </div> </div> <a class="nav-item"> <div class="img"> <a href="https://chenyu.me/"><img src="https://chenyu.me/My/photo/ysni-sj/ysni-sj.png"></a> </div> </a> <div class="nav-item"> <div class="img"> <a href="https://chenyu.me/photo/"><img src="https://chenyu.me/My/photo/ysni-sj/ysni-sj3.png"></a> </div> </div> <div class="nav-item"> <div class="img"> <a href="https://chenyu.me/dh/"><img src="https://chenyu.me/My/photo/ysni-sj/ysni-sj4.png"></a> </div> </div> </nav>以上代码中的菜单链接和图标可以自行更改,图标分辨率为48x48。 修改joe.min.css 然后在CSS文件 JOE 4.7.7及以下老版:CSS文件是在assets/css/joe.min.css)里最下面放入以下代码即可。 JOE 7.X.X及以上新版:joe.global.min.css或joe.normalize.min.css最下面加入。 当然,最好的操作是以上文件的同名.scss文件里编辑然后生成.min.css的文件!(这句话看不懂的可以略过!)/*手机端底部菜单*/ @media (min-width: 768px) { .nav-shouji { display: none !important; } } .nav-shouji{ display: flex; position: fixed; bottom:0; z-index:99; height: 55px; width: 100%; background: var(--background); flex-shrink: 0; font-size: 14px; } .nav-shouji .nav-item { display: flex; flex-direction: column; align-items: center; justify-content: center; width: 100%; color: var(--main); } .nav-item:nth-child(3) { transform: translateY(-20px); background: var(--background); border-radius: 50%; height: 75px; width: 75px; flex-shrink: 2; box-shadow: 0 -3px 4px rgba(0,0,0,.1); } .nav-shouji .nav-item .img { height: 24px; overflow: hidden; } .nav-item:nth-child(3)>.img{ height: 30px; margin-bottom: 5px; } .nav-shouji .nav-item img { width: 24px; height: 24px; overflow: hidden; }icon图标版本 本站现在所使用的版本,手机访问本站即可看见! 1.修改footer.php 首先,在页脚文件foot.php或者footer.php文件的最下面放入以下代码:<div id="mobile-footer"> <ul id="mobile-menu"> <li> <a href="https://chenyu.me/"> <span class="cyicon chenyu-yu"></span> 首页 </a></li> <li> <a href="https://chenyu.me/about/"> <span class="cyicon chenyu-106collect"></span> 关于 </a></li> <li> <a href="https://chenyu.me/whisper/"> <span class="cyicon chenyu-weiyuqiang-"></span> 微语 </a></li> <li> <a href="https://chenyu.me/navigation/"> <span class="cyicon chenyu-ganxie"></span> 排行榜 </a></li> <li> <a href="https://chenyu.me/dh/"> <span class="cyicon chenyu-daohang"></span> 导航 </a></li> </ul> </div>2.修改include.php 在/usr/themes/Joe/public/include.php的19-29行之间新增如下代码:<link rel="stylesheet" href="<?php $this->options->themeUrl('assets/css/cysjdh.css'); ?>">3.新增cysjdh.css 在/usr/themes/Joe/assets/css/路径下新增cysjdh.css文件,内容如下:@import url("//at.alicdn.com/t/font_2611504_8nq4wp1bmb3.css"); @media screen and (min-width:767px){#mobile-footer{display:none}} #mobile-footer{height:50px;background:#fafafa;position:fixed;bottom:0;left:0;border-top:0;width:100%;z-index:9999999} #mobile-menu{display:block} #mobile-menu:after{content:'';display:block;height:0;clear:both} #mobile-menu>li{width:20%;float:left;border-top:1px solid #e6e6eb;height:100%} #mobile-menu>li>a:hover{color:#000;} #mobile-menu>li>.active{color:#000;} #mobile-menu>li>a{text-align:center;color:#777;display:block;line-height:12px;height:100%} #mobile-menu>li>a>span{font-size:20px;display:block;line-height:30px}
2021年06月16日
4,788 阅读
0 评论
0 点赞
2021-06-10
Typecho的Joe主题新增QQ打开自动跳转到浏览器
前言最近QQ抽风,很多站长的网站都被屏蔽白了,我的也不例外而且很多人上午解了下午又白,所以我就想做一个跳转,跳转到浏览器访问然后看到执念有教程,就直接搬过来了,也就当做个备份吧效果图{tabs}{tabs-pane label="后台"}{/tabs-pane}{tabs-pane label="跳转"}{/tabs-pane}{/tabs}修改步骤一、修改functions.php文件新增如下代码;文件路径: usr/themes/Joe/functions.php{tabs}{tabs-pane label="php代码"}$JPrevent = new Typecho_Widget_Helper_Form_Element_Select( 'JPrevent', array('off' => '关闭(默认)', 'on' => '开启'), 'off', '请选择是否开启QQ防红拦截', '介绍:开启后,如果在QQ里打开网站,则会提示跳转浏览器打开' ); $JPrevent->setAttribute('class', 'joe_content joe_custom'); // 如果后台无法展示该设置,将joe_custom修改为joe_other(我改成了joe_post,放在文章设置分类里的) $form->addInput($JPrevent->multiMode());{/tabs-pane}{tabs}{tabs-pane label="图示"}{/tabs-pane}{/tabs}二、修改include.php文件路径如下: usr/themes/Joe/public/include.php在最顶部新增{tabs}{tabs-pane label="代码"}<?php if ($this->options->JPrevent === 'on') : ?> <?php $this->need('public/prevent.php'); ?> <?php endif; ?>{/tabs-pane}{tabs-pane label="图示"}{/tabs-pane}{/tabs}三、新增prevent.php文件下载以下文件,上传路径: usr/themes/Joe/public文件下载:{cloud title="prevent" type="github" url="https://cdn.jsdelivr.net/gh/aill66/cdn@latest/usr/uploads/2021/06/4280840757.zip" password=""/}
2021年06月10日
5,205 阅读
1 评论
0 点赞
2021-06-10
Joe主题新增海报功能——配合插件
效果见本站。0.成品图{tabs}{tabs-pane label="后台设置"}{/tabs-pane}{tabs-pane label="文章底部"}{/tabs-pane}{tabs-pane label="海报样式"}{/tabs-pane}{/tabs}{message type="warning" content="使用手册:激活插件后打开主题的开关设置即可"/}1.将插件文件放在 usr/plugins目录下,并进行激活,下载链接在文章底部2.修改handle.php文件,新增代码,文件路径:usr/themes/Joe-master/public{tabs}{tabs-pane label="代码"}第一段,底部新增 <div style="<?php if(Helper::options()->Haibao !== 'on') echo 'display:none;' ?>"> <div class="article-poster-button" style="text-align: center; margin-left:30px;"> <div class="haibao"> <svg t="1623158793415" class="icon-haibao" viewBox="0 0 1024 1024" version="1.1" xmlns="http://www.w3.org/2000/svg" p-id="2237" width="100%" height="100%"><path d="M512 0C230.4 0 0 230.4 0 512s230.4 512 512 512 512-230.4 512-512-230.4-512-512-512zM403.2 704L256 851.2c-12.8 12.8-32 12.8-44.8 0s-12.8-32 0-44.8l147.2-147.2c12.8-12.8 32-12.8 44.8 0s12.8 32 0 44.8z m460.8-44.8h-192c-12.8 19.2-76.8 102.4-115.2 153.6-19.2 25.6-51.2 25.6-70.4-12.8-25.6-70.4-64-172.8-64-172.8S307.2 576 236.8 544c-25.6-12.8-32-44.8 0-64C294.4 435.2 384 364.8 384 364.8s6.4-128 6.4-204.8c0-44.8 12.8-51.2 19.2-51.2 6.4 0 19.2 0 44.8 19.2 64 44.8 166.4 115.2 166.4 115.2s108.8-32 172.8-51.2c32-12.8 57.6 12.8 51.2 38.4l-51.2 204.8s64 89.6 102.4 153.6c19.2 38.4 6.4 70.4-32 70.4z" fill="#FF9256" p-id="2238"></path></svg> </div> <p style="margin-top:5px; color:#909399; font-size:12px">海报</p> </div> <div class="haibao-shade"> <div class="ball-spin-fade-loader_title">正在生成.....</div> <div class="ball-spin-fade-loader"> <div></div> <div></div> <div></div> <div></div> <div></div> <div></div> <div></div> <div></div> </div> </div> <div data-id="<?php echo $this->cid ?>" class="article-poster action action-poster" style="display:none;"> <div class="poster-popover-mask" data-event="poster-close"> </div> <div class="poster-popover-box"> <a class="poster-download" data-event="poster-download" data-url="">下载海报</a> <img class="article-poster-images"/> </div> </div> </div> 第二段,底部新增 <style> .haibao-shade { background: grey; z-index: 20; opacity: 0.6; position: fixed; pointer-events: auto; top: 0; left: 0; width: 100%; height: 100%; display: none; transition: opacity .25s linear; } @-webkit-keyframes ball-spin-fade-loader { 50% { opacity: 0.3; -webkit-transform: scale(0.4); transform: scale(0.4); } 100% { opacity: 1; -webkit-transform: scale(1); transform: scale(1); } } @keyframes ball-spin-fade-loader { 50% { opacity: 0.3; -webkit-transform: scale(0.4); transform: scale(0.4); } 100% { opacity: 1; -webkit-transform: scale(1); transform: scale(1); } } .ball-spin-fade-loader { position: relative; left: calc(50% - 25px); top: calc(50% - 25px); } .ball-spin-fade-loader_title { position: relative; left: calc(50% - 50px); top: calc(55% - 15px); } .ball-spin-fade-loader > div:nth-child(1) { top: 25px; left: 0; -webkit-animation: ball-spin-fade-loader 1s 0s infinite linear; animation: ball-spin-fade-loader 1s 0s infinite linear; } .ball-spin-fade-loader > div:nth-child(2) { top: 17.04545px; left: 17.04545px; -webkit-animation: ball-spin-fade-loader 1s 0.12s infinite linear; animation: ball-spin-fade-loader 1s 0.12s infinite linear; } .ball-spin-fade-loader > div:nth-child(3) { top: 0; left: 25px; -webkit-animation: ball-spin-fade-loader 1s 0.24s infinite linear; animation: ball-spin-fade-loader 1s 0.24s infinite linear; } .ball-spin-fade-loader > div:nth-child(4) { top: -17.04545px; left: 17.04545px; -webkit-animation: ball-spin-fade-loader 1s 0.36s infinite linear; animation: ball-spin-fade-loader 1s 0.36s infinite linear; } .ball-spin-fade-loader > div:nth-child(5) { top: -25px; left: 0; -webkit-animation: ball-spin-fade-loader 1s 0.48s infinite linear; animation: ball-spin-fade-loader 1s 0.48s infinite linear; } .ball-spin-fade-loader > div:nth-child(6) { top: -17.04545px; left: -17.04545px; -webkit-animation: ball-spin-fade-loader 1s 0.6s infinite linear; animation: ball-spin-fade-loader 1s 0.6s infinite linear; } .ball-spin-fade-loader > div:nth-child(7) { top: 0; left: -25px; -webkit-animation: ball-spin-fade-loader 1s 0.72s infinite linear; animation: ball-spin-fade-loader 1s 0.72s infinite linear; } .ball-spin-fade-loader > div:nth-child(8) { top: 17.04545px; left: -17.04545px; -webkit-animation: ball-spin-fade-loader 1s 0.84s infinite linear; animation: ball-spin-fade-loader 1s 0.84s infinite linear; } .ball-spin-fade-loader > div { background-color: #fff; width: 15px; height: 15px; border-radius: 100%; margin: 2px; -webkit-animation-fill-mode: both; animation-fill-mode: both; position: absolute; } .haibao { width: 42px; height: 42px; background-color: #f56c6c; border-radius: 50%; cursor: pointer; position: relative; z-index: 10; display: flex; justify-content: center; align-items: center; color:#909399; font-size:12px } .haibao:hover { background-color: #409eff; } .article-poster { position:absolute;z-index:999; } </style>{/tabs-pane}{tabs-pane label="代码对应图片"}{/tabs-pane}{/tabs}2.修改functions.php文件,底部新增,文件路径:usr/themes/Joe-master{tabs}{tabs-pane label="代码"}// 海报 $Haibao = new Typecho_Widget_Helper_Form_Element_Select( 'Haibao', array('off' => '关闭(默认)', 'on' => '开启'), 'off', '是否开启底部海报功能', '介绍:开启后,文章底部展示生成海报按钮' ); $Haibao->setAttribute('class', 'joe_content joe_custom'); // 如果后台无法展示开关,则将joe_custom替换为joe_other $form->addInput($Haibao);{/tabs-pane}{tabs-pane label="代码图片"}{/tabs-pane}{/tabs}海报插件下载地址:https://github.com/MoLeft/ArticlePoster
2021年06月10日
4,550 阅读
0 评论
5 点赞
2021-05-16
Typecho博客Joe主题实现打赏设置
其实这个主要是与Joe主题完美契合,之前有文章也写了两种设置方法。0.成品图展示1.新增一个php文件,用于以后新增自定义设置,文件名:custom.php;文件路径:usr/themes/Joe-master/public代码如下<?php // 收款设置 $ZNPaySet = new Typecho_Widget_Helper_Form_Element_Select( 'ZNPaySet', array( 'on' => '开启(默认)', 'off' => '关闭', ), 'on', '是否启用执念打赏功能', '介绍:开启后,文章底部展示打赏功能 <br> 详情可查看 <a href="https://zhinianblog.com/archives/892/">https://zhinianblog.com/archives/892/</a> ' ); $ZNPaySet->setAttribute('class', 'joe_content joe_pay'); $form->addInput($ZNPaySet->multiMode()); $ZNAlipay = new Typecho_Widget_Helper_Form_Element_Text( 'ZNAlipay', NULL, NULL, '支付宝收款码', '介绍:填写此处,打赏界面展示支付宝收款码,图片地址 <br />' ); $ZNAlipay->setAttribute('class', 'joe_content joe_pay'); $form->addInput($ZNAlipay->multiMode()); $ZNWeChat = new Typecho_Widget_Helper_Form_Element_Text( 'ZNWeChat', NULL, NULL, '微信收款码', '介绍:填写此处,微信界面展示微信收款码,图片地址 <br />' ); $ZNWeChat->setAttribute('class', 'joe_content joe_pay'); $form->addInput($ZNWeChat->multiMode()); $ZNQqPay = new Typecho_Widget_Helper_Form_Element_Text( 'ZNQqPay', NULL, NULL, 'QQ收款码', '介绍:填写此处,QQ界面展示QQ收款码,图片地址 <br />' ); $ZNQqPay->setAttribute('class', 'joe_content joe_pay'); $form->addInput($ZNQqPay->multiMode()); ?>2.修改handle.php文件,底部新增代码,放在最后一行上面,文件路径:usr/themes/Joe-master/public代码如下<style> /*弹出*/ .footer_flex { width: 42px; height: 42px; background-color: #f56c6c; border-radius: 50%; cursor: pointer; position: relative; z-index: 10; display: flex; justify-content: center; align-items: center; color:#909399; font-size:12px} .footer_flex:hover { background-color: #409eff; } /*top*/ .footer_flex:hover .flex-footer { display: block; } .footer_flex .flex-footer { box-shadow: 0px 0px 5px 0px #409eff; border-radius: 8px; width: 156px; height: 166px; position: absolute; left: -52px; top: -175px; text-align: center; padding-top: 15px; background: #fff; display: none; } .flex-footer input{vertical-align:middle; margin-bottom:3px; *margin-bottom:3px;} </style> <script language="javascript" type="text/javascript"> function zfb(){ var obj=document.getElementById("ewm"); obj.src=`<?php $this->options->ZNAlipay() ?>`; }; function wx(){ var obj=document.getElementById("ewm"); obj.src=`<?php $this->options->ZNWeChat() ?>`; }; function qq(){ var obj=document.getElementById("ewm"); obj.src=`<?php $this->options->ZNQqPay() ?>`; }; </script> <div style="text-align: center; margin-left:30px; <?php if(Helper::options()->ZNPaySet !== 'on') echo 'display:none;' ?>"> <div class="footer_flex"> <img src="https://cdn.jsdelivr.net/gh/aill66/cdn/shang.png" width="20px" height="20px"> <div class="flex-footer"> <img id="ewm" src="<?php $this->options->ZNAlipay() ?>" width="120px" height="120px"> <div style="margin-top:5px;"> <label><input name="pay" type="radio" value="wx" checked="checked" onclick="wx()">微信</label> <label style="margin-left:3px; display:block-inline"><input name="pay" type="radio" value="zfb" onclick="zfb()" checked>支付宝</label> <label style="margin-left:3px;"><input name="pay" type="radio" value="qq" onclick="qq()">QQ</label> </div> <div style="height:40px; background:rgba(0,0,0,0);"></div> </div> </div> <p style="margin-top:5px; color:#909399; font-size:12px">打赏</p> </div>3.修改functions.php文件,加入打赏设置菜单和底部引入新建的php文件,文件路径:usr/themes/Joe-master代码如下<li class="item" data-current="joe_pay">打赏设置</li> // 收款设置 require_once("public/custom.php");
2021年05月16日
4,831 阅读
0 评论
6 点赞
typecho--JOE新版修改记录
2021年03月05日
7,613 阅读
6 评论
9 点赞
2021-03-05
Joe主题更新太快,把修改的几个小功能记录如下,避免下次更新被覆盖。一、添加排行榜功能https://cmsblog.cn/navi.html二、添加超级时光机功能https://cmsblog.cn/1145.htmlwm_embed_post ids=1145三、添加原创、转载文章功能https://cmsblog.cn/1099.htmlwm_embed_post ids=1099四、添加打赏以及分享功能https://cmsblog.cn/1134.htmlwm_embed_post ids=1134五、添加上一篇、下一篇缩略图功能六、添加评论尾巴显示public/comment.php 里添加 <?php autvip($comments->mail);?>public/aside.php 里添加<?php autvip($item->mail);?>core/function.php 里添加如下代码:/** * 显示用户等级,按邮箱 */ function autvip($i){ $db=Typecho_Db::get(); $mail=$db->fetchAll($db->select(array('COUNT(cid)'=>'rbq'))->from('table.comments')->where('mail = ?', $i)/**->where('authorId = ?','0')**/); foreach ($mail as $sl){ $rbq=$sl['rbq'];} if($rbq<1){ echo '<span class="autlv aut-0">Lv.0</span>'; }elseif ($rbq<10 && $rbq>0) { echo '<span class="autlv aut-1">Lv.1</span>'; }elseif ($rbq<20 && $rbq>=10) { echo '<span class="autlv aut-2">Lv.2</span>'; }elseif ($rbq<40 && $rbq>=20) { echo '<span class="autlv aut-3">Lv.3</span>'; }elseif ($rbq<80 && $rbq>=40) { echo '<span class="autlv aut-4">Lv.4</span>'; }elseif ($rbq<100 && $rbq>=80) { echo '<span class="autlv aut-5">Lv.5</span>'; }elseif ($rbq>=100) { echo '<span class="autlv aut-6">Lv.6</span>'; } }CSS都在我主题的css.css里。七、添加引用文章ID输出功能。改用插件实现八、美化下载插件附件显示样式修改为自带短代码样式九、动态添加点赞功能十、不同分类,不同页面,侧边栏不同
2021-02-21
JOE添加原创以及转载来源
我一向收集的文章比较多,一直也不敢多转载,就是因为不好添加转载来源声明!但也有些自己写的文章,加个原创图标以示区别。 利用typecho的自定义字段来实现此功能,以JOE主题为例,记录如下。效果如图:一、core/core.php 添加如下代码: $Copyrightnew = new Typecho_Widget_Helper_Form_Element_Radio('Copyrightnew', array('0' => _t('原创版权'), '1' => _t('投稿版权'), '2' => _t('转载文章')), '1', _t('投稿版权'), _t('版权类型默认:投稿版权,文章版权类型,可以在主题设置里面新增和编辑版权类型,')); $layout->addItem($Copyrightnew); $url = new Typecho_Widget_Helper_Form_Element_Text('url', NULL, NULL, _t('转载文章来源'), _t('在这里填入一个文章 URL 地址,留空则没有')); $zzz = new Typecho_Widget_Helper_Form_Element_Text('zzz', NULL, NULL, _t('作者名'), _t('原作者')); $url->input->setAttribute('class', 'w-100 setfb'); $layout->addItem($url); $layout->addItem($zzz);二、public/copyright.php里修改为如下代码:<?php if($this->fields->zzz != ''){ echo '<span>转载于: </span><p>'.$this->fields->zzz.'</p>'; }else{ echo '<span>发表者:</span><p>'; $this->author(); echo'</p>'; } ?> <?php if($this->fields->url != ''){ echo '<span>来源网址: </span><p>'.$this->fields->url.'</p>'; }else{ echo '<span>本文链接:</span><p>'.$this->permalink.'(非特殊说明,文章均收集于互网联!)</p>'; } ?> 三、post.php里添加:<?php if ($this->fields->Copyrightnew =='0'):?><div class="originalImg"></div><?php endif; ?>放到 <div class="joe_main joe_post"> 后面。四、添加CSS.originalImg { background: url(assets/img/original.png); background-position: 0 0; background-size: 64px; width: 64px; height: 64px; float:right; right: 0; top: 0;}图片自取。
2021年02月21日
6,032 阅读
13 评论
4 点赞